Products
Solutions
Resources
9977 N 90th Street, Suite 250 Scottsdale, AZ 85258 | 1-800-637-7496
© 2024 InEight, Inc. All Rights Reserved | Privacy Statement | Terms of Service | Cookie Policy | Do not sell/share my information

The Payment claims register lets you see a summary of all payment claims in a project or contract. Contract has Payment claims tabs at both the project and contract levels.
The column chooser shows only the dates set to Active in the settings.

You can add a payment claim from the Payment claims register at both the project and contract levels.
Summary: Add a payment claim when you want to track communication dates with a vendor, to show agreement on the work done and the amount to be invoiced.
Considerations: You must have a schedule of values and payment claims configured for the project.
Quick steps:
From the Payment claims register, click the Add payment claim icon. The Add payment claim dialog box opens.
Enter the payment claim information, including the description and work completed from and work completed to dates. If you added the claim at the project level, you must assign a contract. If you added a claim at the contract level, the claim is automatically assigned to that contract.
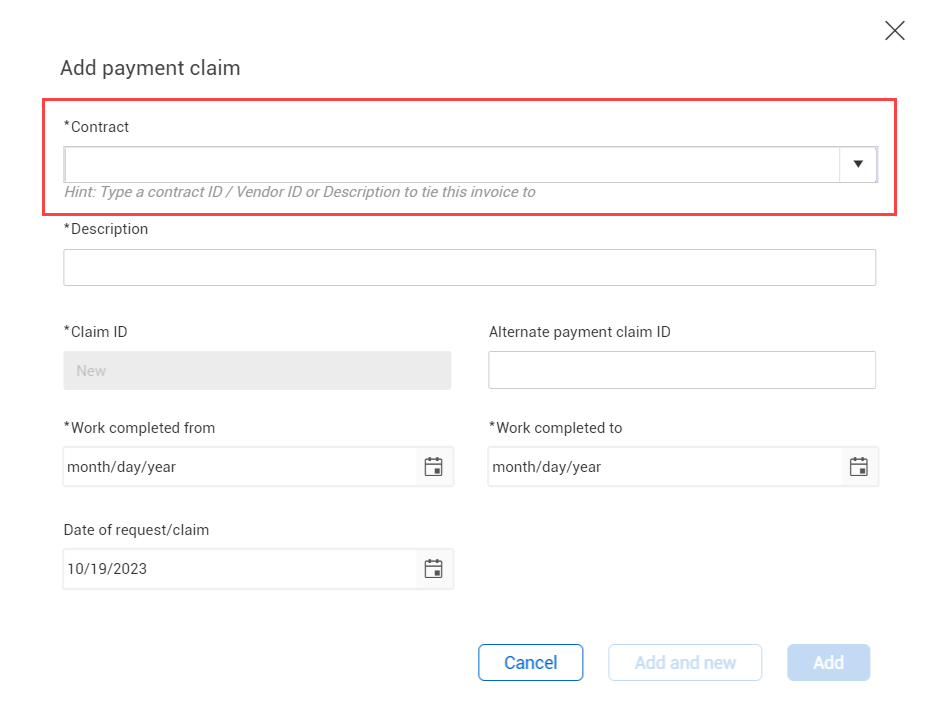
Click Add to add one claim. Click Add and new if you want to add additional claims. The claim is added to the Payment claims register.
What's next: You can add comments and the scheduled dates on the Details tab. You can also add schedule of values items, invoices, and supporting documents on their respective tabs.
A convenient way to add payment claims is to import them using a payment claims import template. Contract provides an import template that you can use to enter payment claims in bulk. To import payment claims, click the Import data from template icon on the project level Payment claims register.

For more information about importing, see Imports and exports.
After importing, you receive an email listing status, the total payment claims, the total imported, and number of errors. If the status is pending, click the Review data link to see the payment claims that have completed and those with errors. You can correct the lines with errors from the Import history grid, select them, and then click Import to continue with the import process. The import is reprocessed, and Contract sends you an email when the import is completed.
Additional Information
9977 N 90th Street, Suite 250 Scottsdale, AZ 85258 | 1-800-637-7496
© 2024 InEight, Inc. All Rights Reserved | Privacy Statement | Terms of Service | Cookie Policy | Do not sell/share my information